---
title: How to add a new loyalty member during checkout in Front Systems
description: how to add a new loyalty member during checkout in front systems
---
[Skip to content](https://support.loyco.io/knowledgebase/how-to-add-a-new-loyalty-member-during-checkout-in-front-systems#main-content)
[](https://support.loyco.io/knowledgebase?hsLang=en)
- [Support](https://support.loyco.io/knowledgebase/contact-us)
Show submenu for Support
- [Book a meeting](https://support.loyco.io/knowledgebase/book-meeting)
- [Contact us](https://support.loyco.io/knowledgebase/contact-us)
- [Program settings](https://www.loyco.io/onboarding)
Open main navigation
Close main navigation
- [Support](https://support.loyco.io/knowledgebase/contact-us)
Show submenu for Support
- [Book a meeting](https://support.loyco.io/knowledgebase/book-meeting)
- [Contact us](https://support.loyco.io/knowledgebase/contact-us)
- [Program settings](https://www.loyco.io/onboarding)
- [Admin login](https://auth.loyco.io/Identity/Account/Login)
[Admin login](https://auth.loyco.io/Identity/Account/Login)
\_
- There are no suggestions because the search field is empty.
1. [Loyco](https://support.loyco.io/knowledgebase?hsLang=en)
2. [Front Systems](https://support.loyco.io/knowledgebase/front-systems?hsLang=en)
3. [Using Loyco in Front Systems](https://support.loyco.io/knowledgebase/front-systems?hsLang=en#using-loyco-in-front-systems)
# How to add a new loyalty member during checkout in Front Systems
## This article explains how your sales team can register a new loyalty member and send a membership invitation directly from the Front Systems POS during checkout.
## How does member registration work in Front Systems POS?
Register a new loyalty member by adding a customer to the sale at checkout in Front Systems POS. If the customer does not exist in the system, a new profile is created on the spot and an SMS invitation is sent automatically. Once the customer completes registration via the SMS link, they become an active loyalty member and start earning bonus points.
## Step 1 — Tap Add Customer
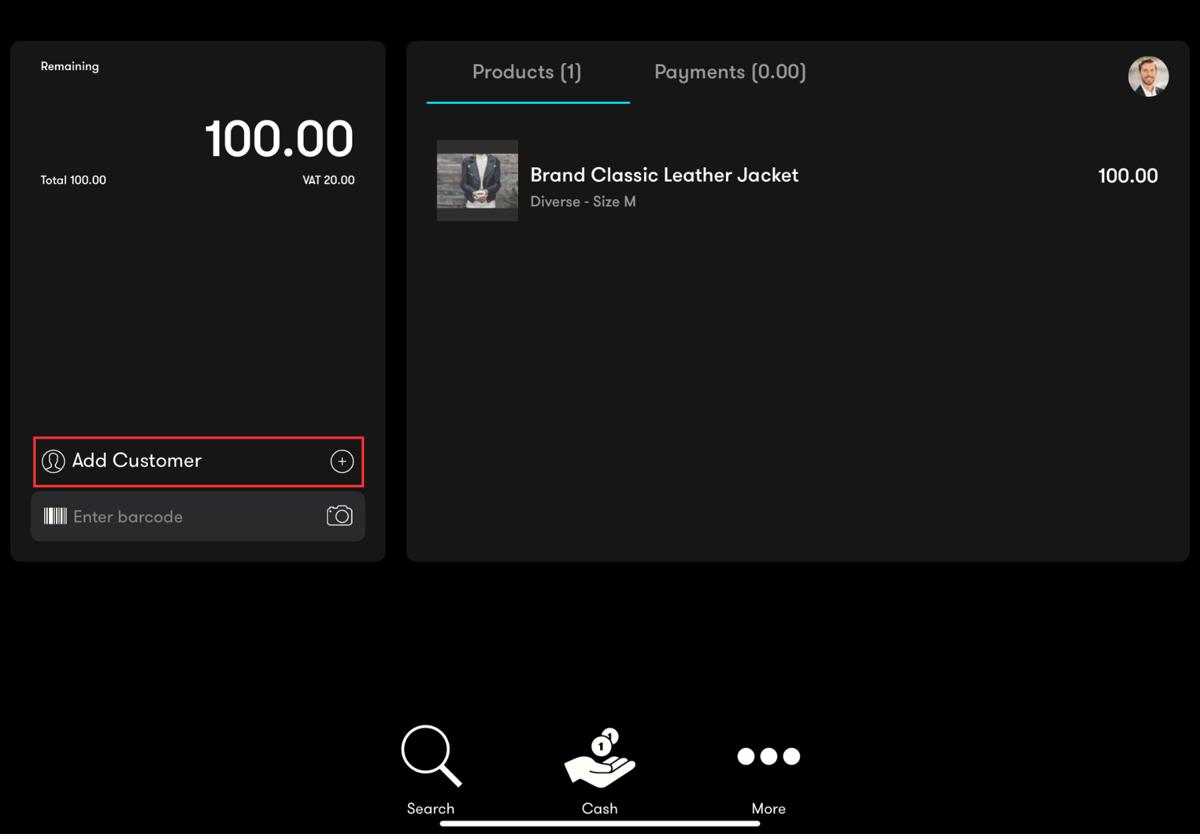
Open the checkout screen in Front Systems POS. Tap Add Customer in the bottom-left corner of the checkout screen to open the customer search.
## Step 2 — Search for the customer
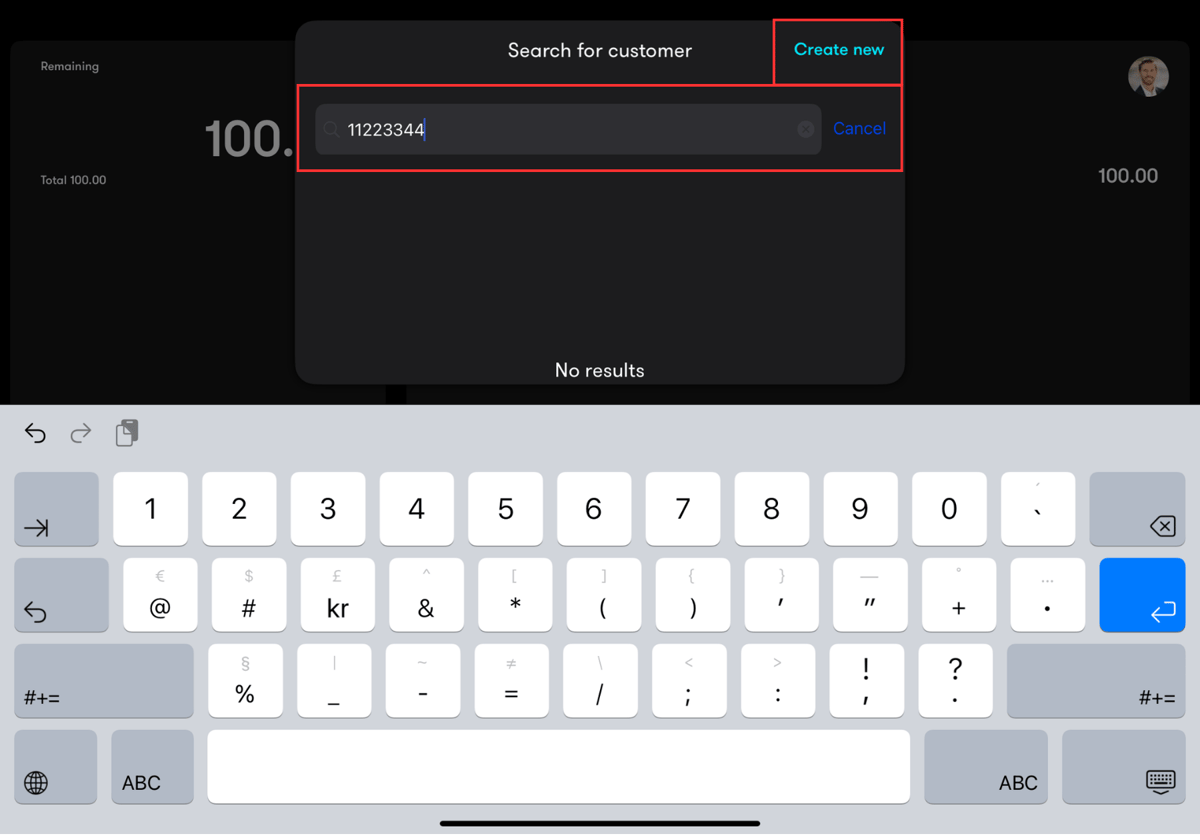
Enter the customer's phone number or name in the search field to check whether they already exist in the system.
- If the customer is found, select their profile to link them to the sale and proceed to Step 5
- If the customer is not found, proceed to Step 3 to create a new profile.
## Step 3 — Create a new customer profile
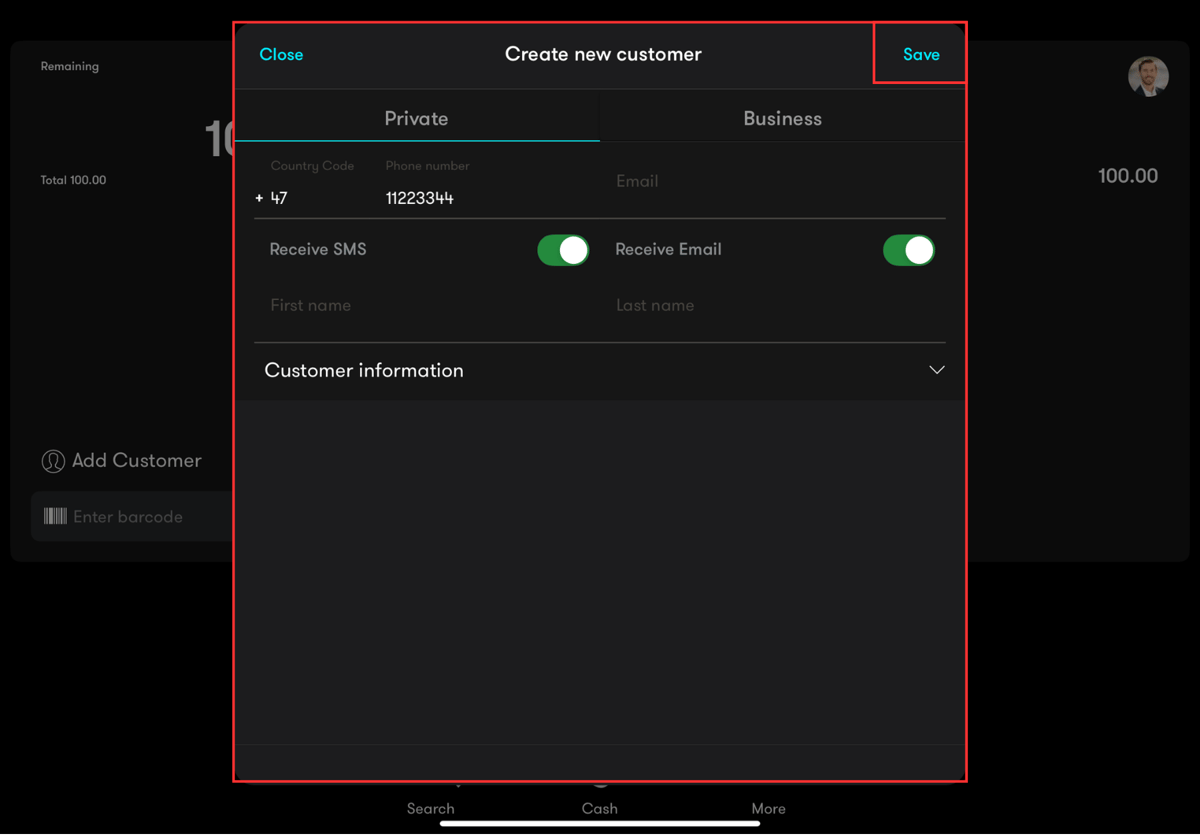
If the customer does not exist in the system, tap Create new in the top-right corner of the search screen. Enter the customer's details including name and phone number. Tap Save to create the profile and trigger the SMS invitation.
**Step 4 — Customer is attached to the sale**
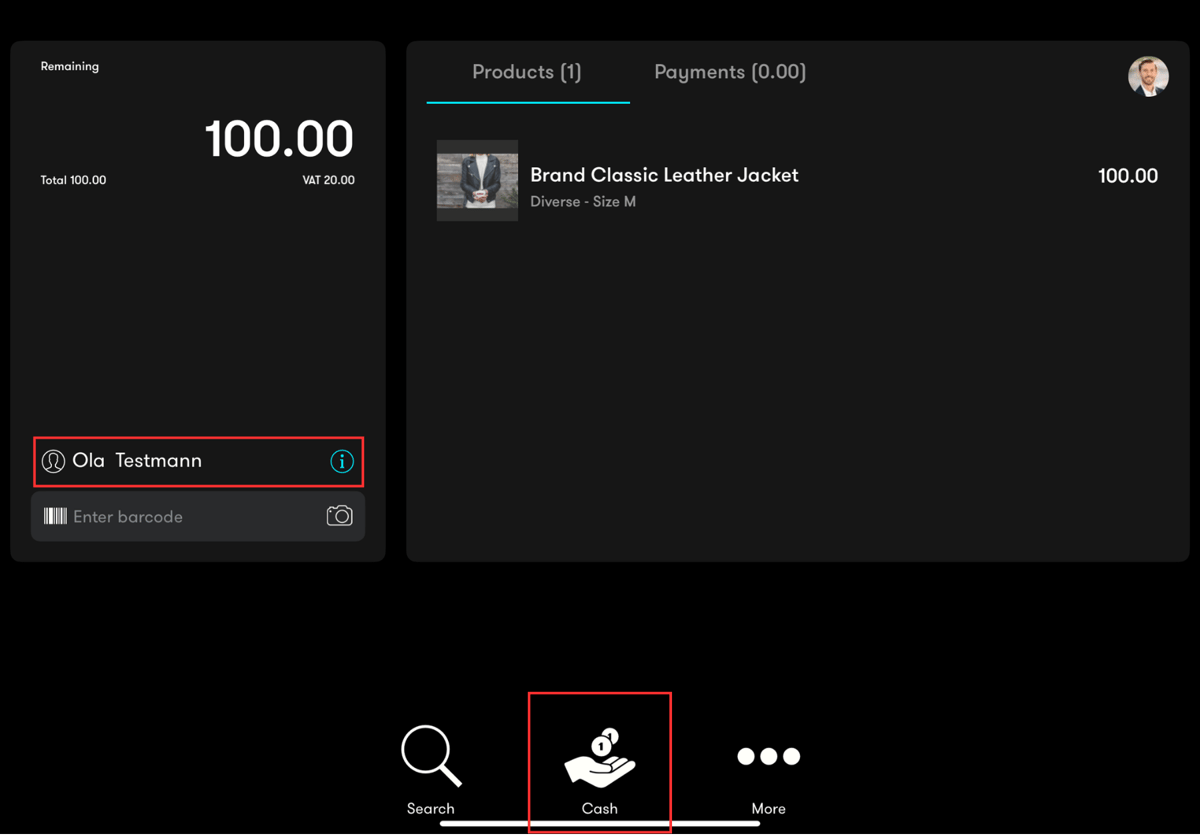
Once the profile is created and saved, the customer is automatically linked to the current sale. The customer's name is now visible in the checkout view, confirming they are connected to the transaction.
**Step 5 — Process payment**
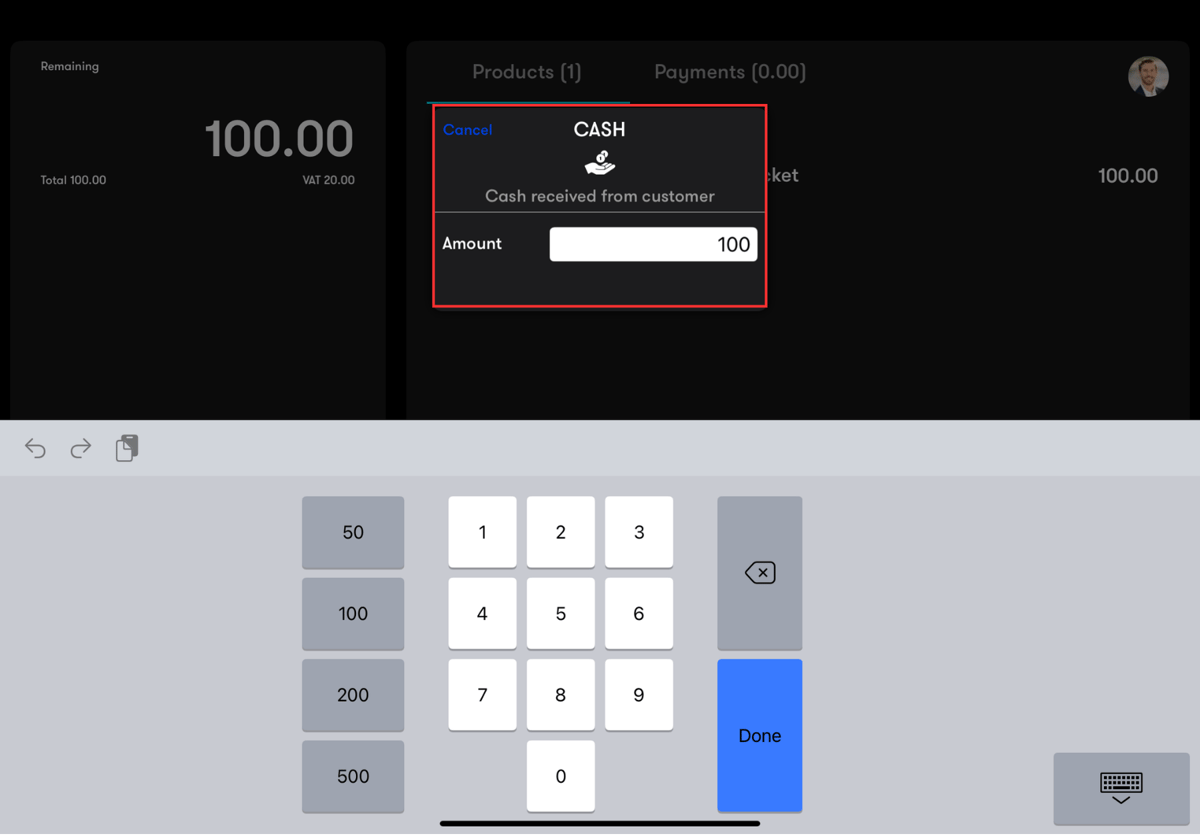
Select the customer's preferred payment method — cash, card, or another available option. Enter the payment amount and confirm the transaction as normal.
**Step 6 — Confirmation and SMS invitation**
After the payment is completed, the receipt screen appears confirming the transaction. The customer is now linked to the sale and will receive an SMS invitation to complete their membership registration.
The customer clicks the link in the SMS, confirms their details and consents, and is activated as a loyalty member. Bonus points from the completed purchase are automatically allocated to their member profile once registration is complete.
.png?width=1200&length=1200&name=Front%20Systems%20Guide%20images%20(SMS%20reg).png)
[](https://loyco.io)
[mailto:support@Loyco.no](mailto:support@Loyco.no)