---
title: VisBook setup guide - Configuration and payment method
description: Configure Loyco in VisBook by enabling member features and setting up Loyco as a payment method. Full technical setup guide for administrators.
---
[Skip to content](https://support.loyco.io/knowledgebase/visbook-setup-guide#main-content)
[](https://support.loyco.io/knowledgebase?hsLang=en)
- [Support](https://support.loyco.io/knowledgebase/contact-us)
Show submenu for Support
- [Book a meeting](https://support.loyco.io/knowledgebase/book-meeting)
- [Contact us](https://support.loyco.io/knowledgebase/contact-us)
- [Program settings](https://www.loyco.io/onboarding)
Open main navigation
Close main navigation
- [Support](https://support.loyco.io/knowledgebase/contact-us)
Show submenu for Support
- [Book a meeting](https://support.loyco.io/knowledgebase/book-meeting)
- [Contact us](https://support.loyco.io/knowledgebase/contact-us)
- [Program settings](https://www.loyco.io/onboarding)
- [Admin login](https://auth.loyco.io/Identity/Account/Login)
[Admin login](https://auth.loyco.io/Identity/Account/Login)
\_
- There are no suggestions because the search field is empty.
1. [Loyco](https://support.loyco.io/knowledgebase?hsLang=en)
2. [VisBook](https://support.loyco.io/knowledgebase/visbook?hsLang=en)
3. [Setup & Configuration](https://support.loyco.io/knowledgebase/visbook?hsLang=en#setup-configuration)
# VisBook setup guide - Configuration and payment method
## This article walks you through the technical setup required to enable Loyco features in VisBook. Complete these steps after the integration has been activated by VisBook and Loyco.
## Part 1 — Help activate invite member and view member
These steps make the Loyco button visible in the customer card and booking page so your reception team can check membership status and invite guests directly from VisBook.
**Step 1 — Open settings**
Click the settings icon in the bottom-right corner of VisBook to open the settings menu. 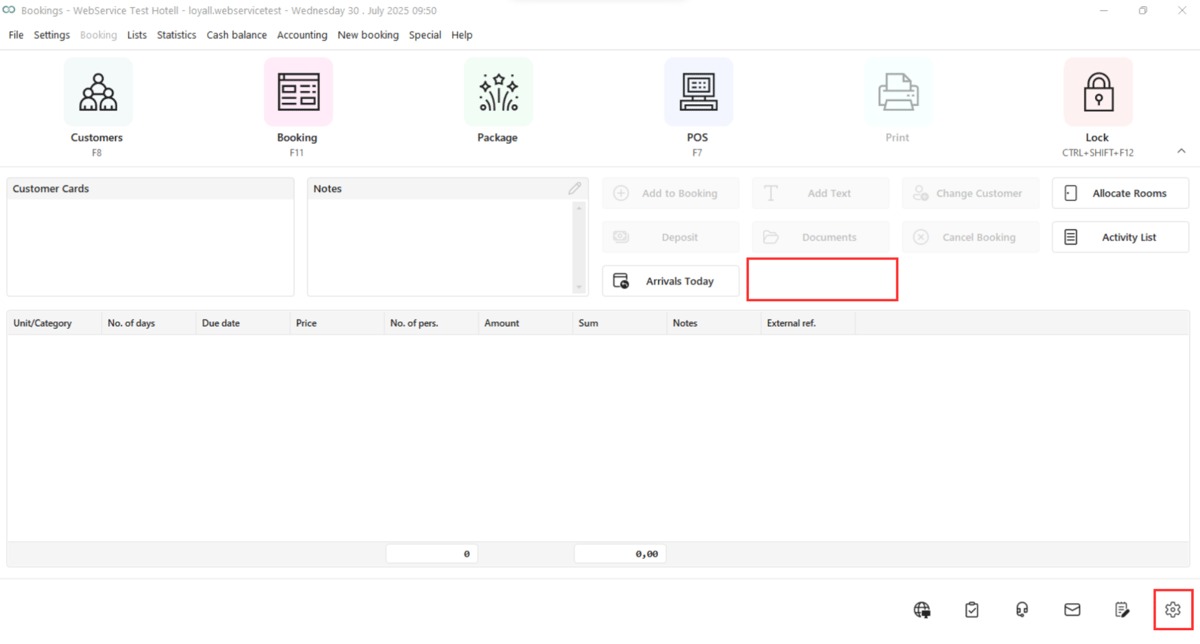
**Step 2 — Search for Loyall**
In the settings menu, search for "Loyall". Toggle it on to enable the Loyco features.
**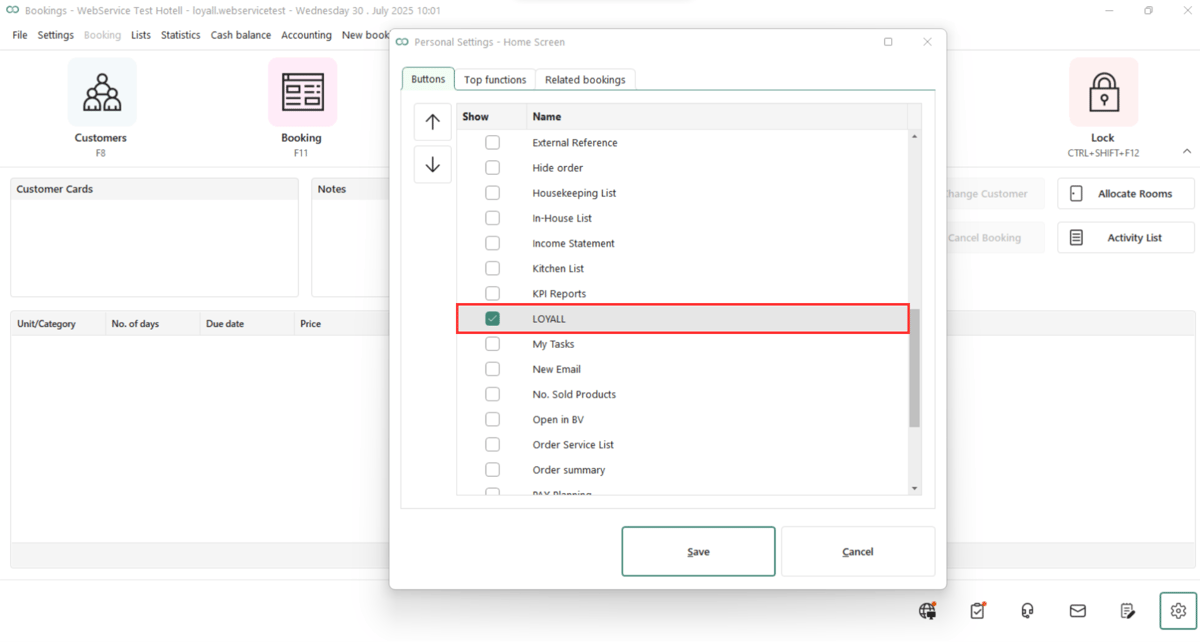**
**Step 3 — Save**
Click Save. The "Invite Member" and "View Member" features will now appear in the customer card and booking page.
.png?width=1200&length=1200&name=Activate%20_invite%20member_%20and%20_view%20member_%20step%201_3%20(2).png)
**Before starting Part 2:** You must first create the new account in VisBook. Go to **Accounting**, open the chart of accounts, click **New account**, give it a name (for example, *Loyco points*), and save it. You will select this account in the steps below.
## Part 2 — Add new account
1. Go to **Accounting settlement/revenue**.
2. Select the account you created in Part 2.
3. Set **Type of payment** to **External gift card/cashcard**.
4. Set **External integrator** to **Loyco**.
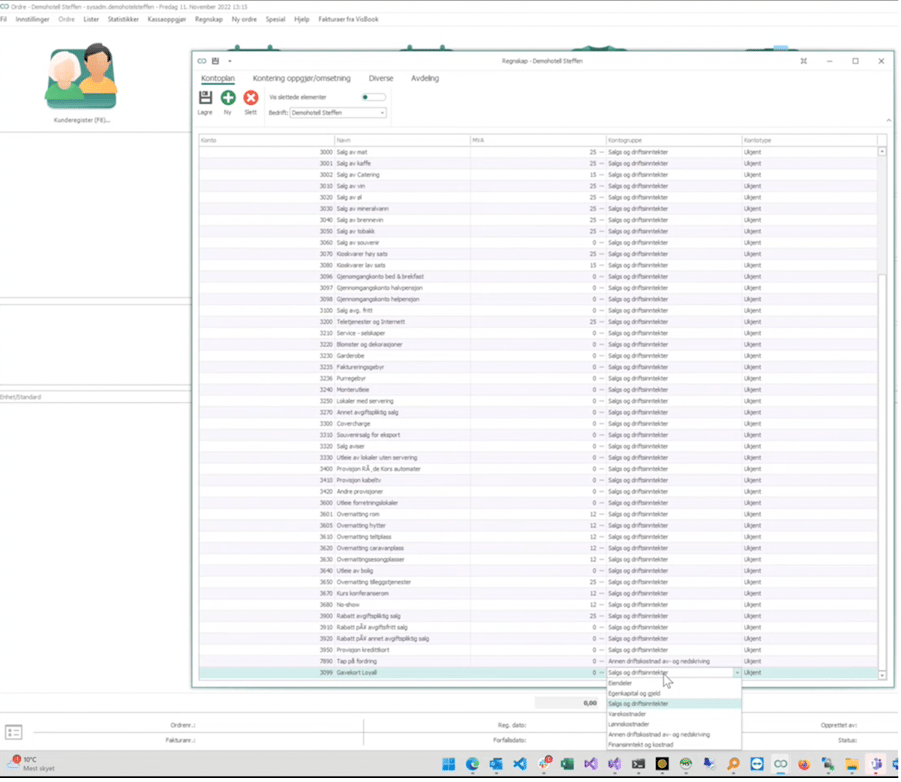
**Part 3 - Link the new account to the new payment method.**
1. Go to **Accounting settlement/revenue**.
2. Select the account you created in Part 2.
3. Set **Type of payment** to **External gift card/cashcard**.
4. Set **External integrator** to **Loyco**.
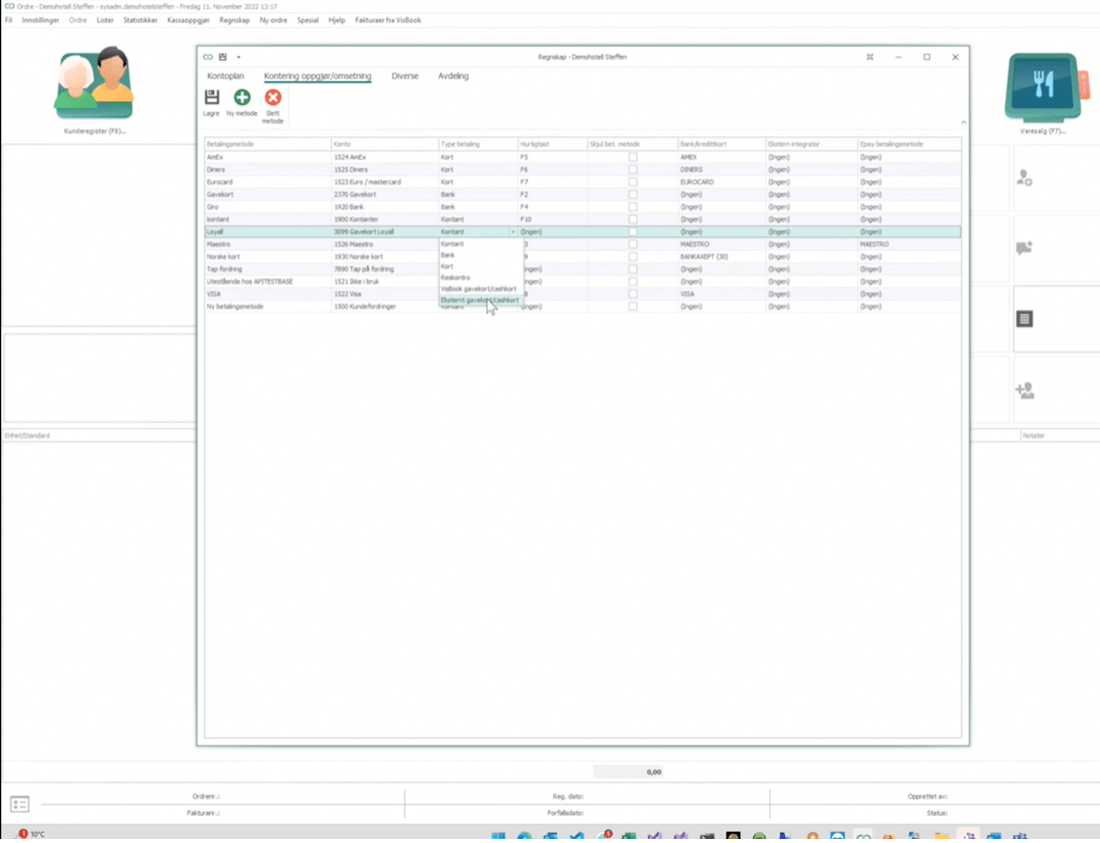
**Verify the setup**
Once all three parts are complete, verify the setup is working correctly:
- Open a customer card in VisBook and confirm the **Invite Member** and **View Member** buttons are visible.
- Open a booking page and confirm the same buttons appear there.
- Attempt a test transaction using the Loyco payment method and verify it processes without errors.
[](https://loyco.io)
[mailto:support@Loyco.no](mailto:support@Loyco.no)